7 min read
Disclosure: As an Amazon Associate and eBay Partner Network publisher, we earn from qualifying purchases. This doesn’t affect what we recommend or how we describe it.
Frothing milk without a steamer isn’t just a workaround for those without fancy espresso machines—it’s a skill that opens up café-style drinks to anyone with a stovetop and a little patience. Whether you’re crafting a homemade cappuccino, latte, or flat white, you can achieve creamy, textured milk foam using tools you already have or affordable gadgets designed for home brewers. Let’s break down the best methods, what each delivers, and how to avoid the pitfalls that lead to sad, flat milk instead of rich, velvety microfoam.
Comparing the Best Non-Steamer Milk Frothing Methods
| Method | Texture Quality | Effort Required | Capacity (oz) | Cleanup Time (min) | Price |
|---|---|---|---|---|---|
| Handheld Electric Whisk | Fine foam, moderate microfoam | Low | 6–12 | 1–2 | $$ |
| Manual Pump Frother | Dense, creamy foam | Medium | 8–16 | 2–3 | $$ |
| Mason Jar Shaking | Large bubbles, airy foam | High | 8–16 | 1 | $ |
| French Press Plunging | Good microfoam (with practice) | Medium | 12–34 | 3–4 | $$$ |
Note on pricing: the $ symbols are relative tiers within this comparison — $ is the cheapest of the bunch, $$$ the priciest. Live listings (and exact prices) appear further on.
What Makes Great Frothed Milk—And Why Steam Isn’t Required
Steamed milk gets its silky texture from a combination of heat and aeration. The goal is to create microfoam—tiny, uniform bubbles suspended in milk, giving it a sweet, velvety mouthfeel. While a commercial steam wand injects steam at about 130–150°F and 1–2 bars of pressure, you can mimic most of this effect through agitation and controlled heating. The real trick is to avoid overheating (which scalds the milk at around 170°F) and to introduce air slowly for fine bubbles, not large ones.
Whole milk is the gold standard for home frothing, thanks to its 3–4% fat content, but you can froth 2% or non-dairy milks with slightly less creamy results. For best flavor and foam, aim for 140–150°F—just hot to the touch, but not boiling. For more technical background, see this milk science explainer by Serious Eats.
How to Froth Milk Without a Steamer: Step-by-Step Guide
- Heat your milk to 140–150°F.
Pour your desired amount of milk into a small saucepan or microwave-safe container. Warm the milk gently—use a thermometer for precision, or stop when it’s hot but not simmering. - Choose your frothing method.
Pick one: a handheld electric whisk, manual pump frother, French press, or a mason jar with tight lid. Each has its own quirks and results (see the table above). - Agitate to introduce air.
For a whisk, immerse and run for 15–30 seconds; for a manual frother or French press, pump the plunger up and down vigorously for 20–40 seconds; for a jar, shake as hard as you can for 30–60 seconds. Stop when the milk doubles in volume or forms a thick layer of foam. - Tap and swirl to finish.
Gently tap your container on the counter to pop larger bubbles, then swirl the milk to help the foam settle. For best results, pour immediately over your brewed coffee.
With practice, you’ll get a feel for the right timing, temperature, and technique for your preferred method. If you want to upgrade your home setup, compare current options for manual and electric frothers.
Related Guides
- Our guide to Milk Frothers for Lattes: A Practical Buyer’s Guide
- How to Dial In Grind Size for Espresso: A Step-by-Step Guide
- How to Calibrate a Coffee Scale: A Step-by-Step Guide
- Espresso Machine vs Moka Pot: What’s the Real Difference?
- Choosing the Right Grinder for French Press Coffee
- How to Find the Right Replacement Parts for Your Burr Grinder
- Browse all Espresso & Milk →
Method Deep Dive: Pros, Cons, and Tips for Each Approach
Each non-steamer method comes with its own strengths and quirks. Here’s what you need to know before you commit—or before you improvise with whatever’s in your kitchen drawer.
- Handheld Electric Whisk: These battery-powered whisks spin at 12,000–15,000 RPM and can froth 6–12 oz of milk in under 30 seconds. They’re intuitive, quick, and easy to clean—just rinse the whisk head under hot water. The foam is fine for lattes and cappuccinos, though not as dense as what you’d get with a pump frother. For thickest results, move the whisk just below the milk surface for the first 10 seconds, then deeper for the rest. See today’s deals.
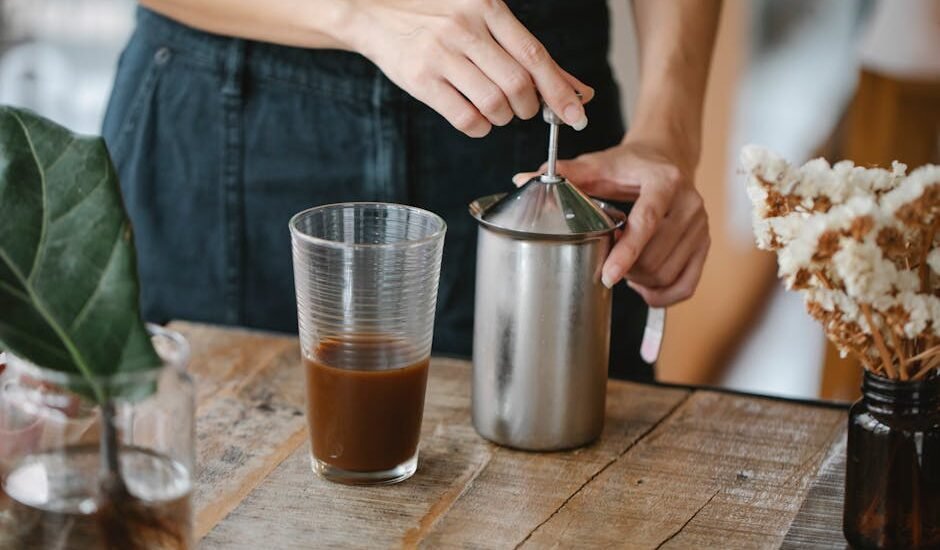
- Manual Pump Frother: This device looks like a French press but is purpose-built for milk. By rapidly pumping the mesh plunger (20–40 times), you force air into the milk, creating dense, creamy foam. You can froth up to 16 oz at a time, making it great for serving multiple drinks. It takes more effort and a bit of elbow grease, but the results are reliable. Clean-up is straightforward—just rinse and plunge with hot water. Check current prices.
- Mason Jar Shaking: The true DIY approach: pour warm milk into a jar (no more than halfway full), screw on the lid tightly, and shake hard for up to a minute. This creates froth with big, airy bubbles rather than microfoam, so it works best for drinks where texture isn’t critical. There’s no extra cost, but the results are inconsistent and the foam collapses quickly. Watch out for hot milk and pressure buildup—always use a towel and open the jar slowly.
- French Press Plunging: Many home brewers already own a French press, which doubles as a highly effective manual frother. Pour in warm milk, fill no more than a third of the way (to avoid spills), and pump the plunger up and down vigorously. The mesh filter introduces air, creating fine microfoam. With practice, you can get café-like results, though it takes a minute or two and a bit of cleanup. Larger presses can handle enough milk for 2–3 drinks at once. View what’s available.
Practical Tips for Better Milk Foam at Home
Getting quality foam is about technique as much as equipment. Here are field-tested tips for home success:
- Use fresh, cold milk for best results. Cold milk traps air more easily, and fresh milk foams more consistently.
- Don’t overheat—scalded milk tastes flat and won’t foam well. Stick to 140–150°F (60–65°C).
- Whole milk is easiest, but you can froth oat, almond, or soy milks—just expect slightly different textures.
- Clean your frother or jar thoroughly after each use; dried milk residue kills foam quality next time.
- If your foam is too bubbly or collapses fast, try agitating more gently and stopping sooner.
For a more technical breakdown of milk proteins and how they influence foam, see this detailed resource from the Coffee Institute.
Frequently Asked Questions About Frothing Milk Without a Steamer
How long does it take to froth milk using these methods?
Most methods take 30 seconds to 2 minutes, depending on your tool and batch size. Electric whisks are fastest (30–45 seconds), while manual frothers and French presses take about 1–2 minutes for 8–16 oz of milk. Mason jar shaking often takes a full minute or more for decent foam.
Which is better for lattes: handheld whisk or French press?
For classic lattes, the French press usually delivers finer, silkier microfoam, especially for pouring latte art. Handheld whisks are quicker and easier to clean, but tend to make slightly larger bubbles. Choose the French press if you want café-style texture; opt for the whisk if you value speed and convenience.
Does the type of milk matter for frothing?
Yes, whole milk (3–4% fat) froths best, producing rich, creamy foam. Non-dairy options like oat or soy milk can foam well, but results vary by brand and formulation. Skim milk makes larger, stiffer bubbles—good for cappuccinos but less for lattes. For best home results, use milk labeled as “barista” style if you prefer plant-based options.
Can I return a manual frother if it doesn’t work with my milk type?
Most retailers allow returns within 14–30 days, but always check the specific store policy before purchasing. Some manual frothers have compatibility notes for non-dairy milks; if you’re concerned, look for options with satisfaction guarantees or flexible return terms. Keep original packaging until you’re sure it meets your needs.
How much milk should I froth at a time?
Never fill your frothing container more than halfway—milk expands rapidly when frothed. For most home tools, 6–12 oz is the sweet spot. Overfilling leads to spills and inconsistent foam. If you need more, froth in batches for best results.
What’s the best way to clean a French press after frothing milk?
Rinse the carafe and plunger immediately with hot water, then wash with mild soap. Milk residue can sour and ruin future foam if left to dry. For stubborn buildup, soak in a mix of hot water and baking soda for 10–15 minutes, then scrub with a non-abrasive brush.
Final Thoughts: Finding the Right Frothing Method for Your Kitchen
You don’t need a high-end espresso machine to enjoy silky, frothed milk at home. From the humble mason jar to the versatile French press, there’s a solution for every budget and kitchen setup. Prioritize the method that fits your daily routine—manual frothers for dense foam and larger batches, electric whisks for convenience, or DIY options for zero extra cost. With a bit of practice, you’ll be pouring café-style drinks without ever touching a steam wand. Ready to upgrade your kit? Compare current options and see which frother fits your style and budget best.
Last updated: May 2026 · How we cover this topic