7 min read
Ever wonder why your home pour-over sometimes tastes papery or flat, even when you use good beans? The way you pre wet your coffee filter might be the culprit. Pre wetting (also called rinsing) your coffee filter isn’t just a barista trick — it removes unwanted paper flavors and preheats your brewer, setting the stage for a cleaner, more balanced cup. Here’s how to do it right, what methods actually matter, and how to fit this simple step into your daily routine without making a mess.
Spot the difference between pre wetting methods
| Approach | Typical Tool | Water Needed (oz) | Filter Type Compatibility | Setup Time (sec) |
|---|---|---|---|---|
| Manual Kettle Pour | Gooseneck Kettle | 4–8 oz | All paper filters | 20–40 |
| Tap Water Rinse | Standard Faucet | 4–8 oz | Flat-bottom & cone | 10–20 |
| Electric Kettle Preheat | Variable-temp Kettle | 4–10 oz | All paper filters | 30–60 |
| Dedicated Rinsing Station | Countertop Rinse Tray | 8–16 oz | Chemex & Large Filters | 40–90 |
Choose the right pre wetting method for your setup
Not every kitchen or morning routine needs a fancy approach. Here’s what sets each method apart — and which one might make sense for you.
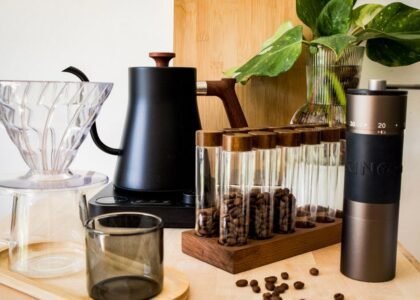
- Manual kettle pour: The classic. Using a gooseneck kettle gives you control over water flow and direction, making it easy to saturate the filter evenly. This method works best for pour-over cones and drippers, and it doubles as a way to preheat your brewer. For most home setups, it’s the simplest and most effective choice.
- Tap water rinse: If you don’t have a kettle handy, rinsing the filter under the tap is quick and practical. The downside: tap water might be cooler than ideal and could leave mineral or chlorine flavors. It’s fast, but not the best for flavor clarity.
- Electric kettle preheat: Using a variable-temperature kettle lets you rinse with water at your target brew temperature (usually 195–205°F / 90–96°C). This is ideal if you’re serious about consistency, since it preheats everything and avoids flavor loss. See today’s deals
- Dedicated rinsing station: Overkill for most, but if you brew big batches or use oversized filters (like for Chemex or batch brewers), a rinsing tray streamlines the process and keeps your counter dry. It’s a premium option but worth considering if you brew for a crowd.
Related Guides
- Our guide to Automatic Drip Coffee Makers for Effortless Brewing
- Our guide to Coffee Carafes Worth Buying: Our Practical Guide
- Coffee Knock Boxes That Are Actually Worth Buying
- Our guide to Coffee Scales With Timers: Which Ones Are Actually Worth Buying?
- Coffee Containers for Keeping Beans Fresh
- The Best Conical Burr Grinders for Great Drip Coffee at Home
- Browse all Brewing Guides →
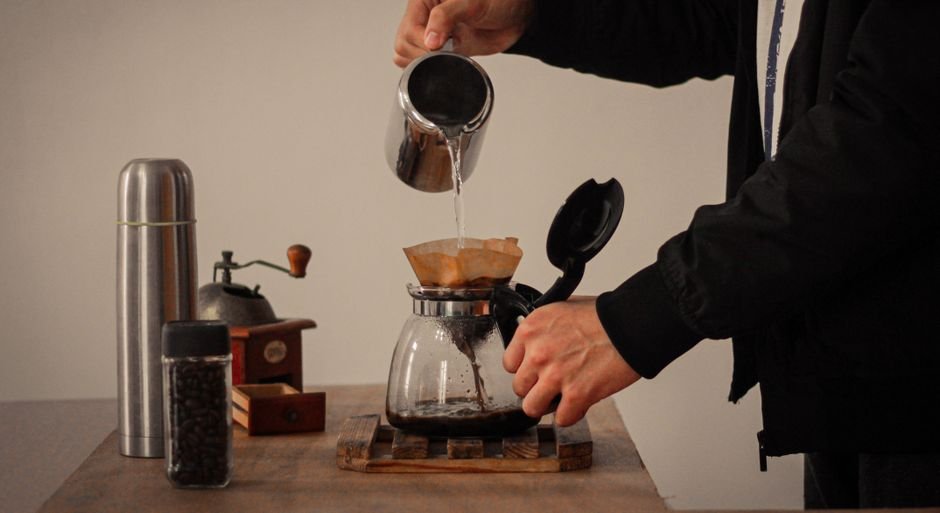
How to pre wet coffee filter: step-by-step guide
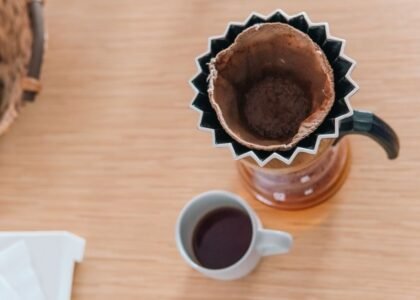
- Place the filter in your dripper or brewer. Make sure the filter fits snugly and sits flush against the cone or basket to avoid channeling during brewing.
- Heat your rinse water. Ideally, use freshly boiled water cooled to about 200°F (93°C). If you don’t have a thermometer, just use water right off the boil for most paper filters.
- Pour water evenly over the filter. Use 4–8 ounces (120–240 ml) of hot water, starting from the center and spiraling outward. Fully saturate the filter, making sure all of it is wet.
- Discard the rinse water. Remove the dripper or brewer from your mug or carafe and pour out the water collected below. This step is crucial—leaving the rinse water in will dilute your coffee and add odd flavors.
- Add your ground coffee and proceed with brewing. With the filter prewetted and the brewer preheated, you’re ready for a cleaner, more vibrant cup.
Why bother? The impact of pre wetting on cup quality
Skipping the pre wet step can leave your coffee tasting like wet cardboard or paper. That’s because paper filters—especially bleached or thick ones—often carry manufacturing residues and fibers that dissolve into hot water. Rinsing flushes these away before they reach your mug. It also warms up your dripper or carafe, helping your brew maintain stable extraction temperatures. The result? A cup that’s brighter, cleaner, and truer to your beans’ flavors.
Research from the food science community supports the idea that water temperature and filter rinsing can impact extraction and flavor clarity, especially in pour-over methods. Even a quick rinse can make a noticeable difference in side-by-side tastings.
Quick decision tree
- If you want the fastest method: Use the tap water rinse. It takes less than 30 seconds, though the flavor payoff is modest.
- If you brew specialty pour-overs daily: The manual kettle pour is your best bet for control and consistency.
- If you’re chasing perfect temperature: Opt for the electric kettle preheat method for precise results.
- If you brew big batches or host often: Consider investing in a dedicated rinsing station to streamline cleanup and handle large filters.
- If budget is your top concern: Stick with manual or tap rinsing—no extra gear needed.
Common mistakes and how to avoid them
Even experienced home brewers sometimes fumble the pre wet step. Here’s where it goes wrong:
- Not using enough water: A quick splash won’t do it. Aim for at least 4 ounces (about 120 ml) to ensure full saturation and flavor removal.
- Leaving the rinse water in: Always discard the water collected in your mug or carafe before brewing. Otherwise, you’ll dilute your first sips and muddy the flavors.
- Using cold or tap water: Cold water can shock the filter and brewer, hurting extraction. Chlorinated tap water can add off-notes. Use hot, filtered water whenever possible.
- Forgetting to preheat the brewing vessel: The rinse isn’t just for the filter—it’s also for warming up your dripper or server. This helps maintain even brewing temps.
FAQs about pre wetting coffee filters
How much water should I use to pre wet a coffee filter?
Use at least 4 ounces (120 ml) of hot water for most standard cone or flat-bottom filters. For larger batch brewers or Chemex-style setups, 8–10 ounces (240–300 ml) is better to ensure full saturation. Too little water leaves papery flavors behind.
Is pre wetting necessary for all paper filters?
While some high-end filters claim to be “flavor neutral,” most paper filters—especially thick or unbleached ones—benefit from pre wetting. Bleached filters usually require less rinsing, but skipping this step can still lead to subtle off-flavors and inconsistent temperature during brewing.
Manual kettle pour vs. tap water rinse — which is better?
Manual kettle pours give you more control over water temperature and distribution, which leads to better flavor and consistency. Tap rinsing is faster, but often uses colder and less pure water, which can leave behind flavors or affect extraction. For best results, stick with a kettle and filtered water.
How long does it take to pre wet a coffee filter?
The entire process usually takes 20–60 seconds, depending on your method and filter size. Manual pours take a bit longer, especially for oversized filters, while tap rinses are quickest but less effective for flavor removal.
Can I pre wet filters in advance?
It’s not recommended. Pre wetting filters ahead of time can lead to them drying out, warping, or collecting dust and odors. Always rinse your filter immediately before brewing for the cleanest results.
Will pre wetting work with metal or cloth filters?
Pre wetting is specific to paper filters, which can carry papery flavors. Metal and cloth filters don’t require rinsing for flavor reasons, but a quick rinse with hot water can still help preheat your brewing gear and remove any lingering residue from previous use.
Do I need special equipment to pre wet my filter?
No special equipment is required. A standard kettle, even a basic stovetop model, works for most home brewers. Variable-temperature kettles or rinsing trays are upgrades for those who want more control or brew in large batches, but aren’t essential for everyday use.
What if I forget to discard the rinse water?
If you accidentally brew over the rinse water, your coffee may taste weak or slightly off. Always remember to pour out the rinse water before adding grounds and starting your brew. It’s a small detail that makes a big difference in cup quality.
Final thoughts: make pre wetting a habit for better coffee
Pre wetting your coffee filter isn’t just coffee geekery — it’s a practical, low-effort way to improve every cup you brew at home. Whether you use a simple kettle, tap water, or invest in a fancier setup, the payoff is in the cup: cleaner flavors, fewer off-notes, and more consistent results. If you’re upgrading your gear, look for drippers and kettles that make rinsing easy. Otherwise, start with what you have and see if you notice the difference. For more science-backed brewing techniques, check out the Coffee Chemistry resource hub.
Ready to refine your morning routine? View what’s available in pour-over kettles and accessories to take the guesswork out of pre wetting and brewing.
Last updated: June 2026 · How we cover this topic