8 min read
Disclosure: As an Amazon Associate and eBay Partner Network publisher, we earn from qualifying purchases. This doesn’t affect what we recommend or how we describe it.
How do you keep a milk frother from turning into a crusty, sour-smelling mess? The answer depends on the type of frother you use and how often you make lattes or cappuccinos at home. Letting milk dry inside any frother—even for a few hours—can make cleanup a nightmare and ruin your next cup. This guide cuts through the confusion, showing you exactly how to clean any style of milk frother, what tools make the job easier, and how to avoid the most common mistakes that shorten your gear’s lifespan.
Spot the difference between frother types before you scrub
Not all milk frothers are created equal when it comes to cleaning. The design, materials, and internal mechanics can make a huge difference in how much effort (and frustration) you’ll face. Here’s a breakdown of the four main categories you’ll encounter at home:
| Type | Cleaning Method | Parts to Clean | Dishwasher Safe | Cleaning Time (min) |
|---|---|---|---|---|
| Handheld Wand | Rinse + Wipe | Whisk head, shaft | No | 1–2 |
| Manual Pump Jug | Disassemble + Soak | Jug, plunger, mesh | Jug only (most) | 3–5 |
| Automatic Electric Jug | Disassemble + Wipe | Jug, lid, whisk, base | Some parts | 5–8 |
| Espresso Machine Steam Wand | Purge + Wipe + Soak | Steam tip, wand, jug | No | 3–6 |
Choose the right cleaning routine for your frother
Each frother type demands a different approach. Here’s how to match your cleaning method to your gear:
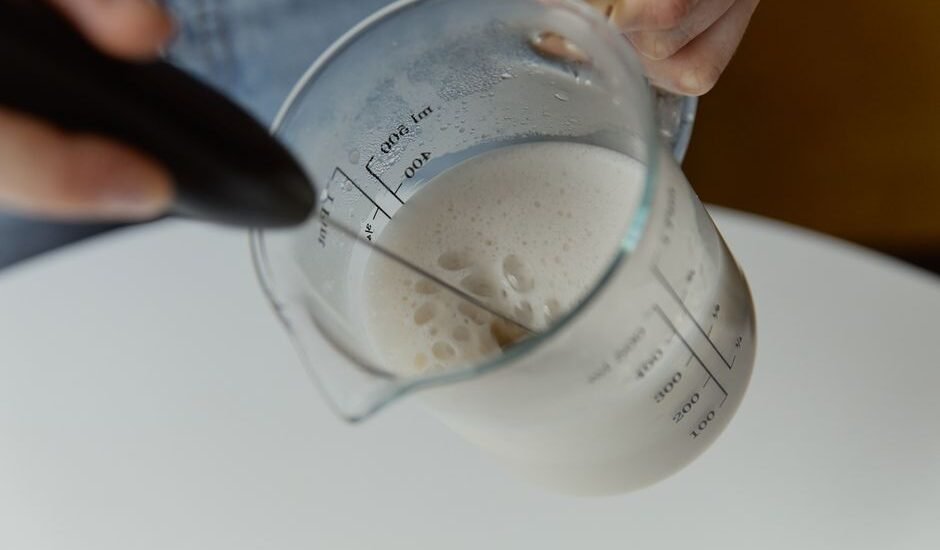
- Handheld wands only need a quick rinse under running water, then a wipe of the whisk head. Don’t submerge the handle or battery compartment.
- Manual pump jugs (think plunger-style frothers) need to be fully disassembled. Soak the jug and mesh in warm, soapy water. Use a bottle brush for the mesh if milk residue clings.
- Automatic electric jugs have removable whisks and lids. Most can’t go in the dishwasher except for the jug itself (and only if labeled dishwasher-safe). The heating base should never get wet—a damp cloth is all you need.
- Espresso machine steam wands require immediate wiping and purging after each use. For deeper cleans, soak the tip in a solution of water and a milk cleaner designed for coffee equipment.
Not sure which style matches your setup? Check your manual or look for product diagrams online—most manufacturers have guides on their support pages.
How to clean a milk frother: step-by-step for every style
- Unplug or turn off your frother to prevent electrical accidents or burns. For steam wands, make sure the machine is off and cool.
- Disassemble all removable parts like lids, whisks, mesh filters, and jugs. Consult your manual if you’re unsure which pieces come apart.
- Rinse parts immediately after use under warm running water. Don’t let milk dry—dried milk is much harder to remove and can cause odors.
- Soak stubborn parts in soapy water for 5–10 minutes. Use a soft sponge or bottle brush for mesh screens and whisks. Avoid abrasive pads that scratch stainless steel or nonstick coatings.
- Wipe down non-removable or electrical parts (like the base of an electric jug or steam wand body) with a damp cloth. Never immerse these in water.
- Rinse and dry thoroughly before reassembling. Let everything air-dry or towel dry to prevent water spots and bacterial growth.
- Purge steam wands by running steam for 2–3 seconds into a damp cloth after reattaching. This clears out any milk left inside the wand.
Don’t let these cleaning mistakes ruin your frother
Some cleaning habits can do more harm than good. Here’s what to avoid:
- Letting milk sit for hours—baked-on milk is nearly impossible to remove without soaking or using specialty cleaners.
- Using steel wool or harsh scrubbing pads—these destroy nonstick coatings and scratch stainless steel, making future cleaning harder.
- Submerging electrical components—this leads to short circuits and voided warranties.
- Ignoring the steam wand purge—milk can clog the wand internally, causing steam pressure issues or funky smells in future drinks.
- Skipping regular deep cleans—over weeks, milk residue can build up inside mesh or under whisk heads, affecting froth quality.
For a more technical look at why milk residue is so stubborn, see the U.S. Dairy Export Council’s resources on milk proteins and cleaning challenges.
Related Guides
- Our guide to How to Clean a Milk Frother: Simple Steps for Better Coffee
- Our guide to Milk Frothers for Lattes: A Practical Buyer’s Guide
- Our guide to How Manual Milk Frothers Work: A Simple Guide for Home Brewers
- How to Froth Milk Without a Steamer: Easy Methods for Home Brewers
- Manual Milk Frothers for Coffee: What to Know Before You Buy
Quick decision tree
- If you want the fastest clean-up: Handheld wands rinse off in seconds—choose this style for daily convenience.
- If dishwasher compatibility is a must: Manual pump jugs with dishwasher-safe jugs are your best bet.
- If you prioritize froth texture: Automatic electric jugs and steam wands offer better microfoam, but need more hands-on cleaning.
- If you’re on a tight budget: Manual pump jugs and handheld wands both cost less and clean up quickly.
- If you already own an espresso machine: Use the built-in steam wand, but commit to wiping and purging after every use.
Deep clean less often, but do it right
Even with daily rinsing, a deeper clean once a week (or every 10–15 uses) keeps milk frothers working their best. Use a descaling or milk cleaning solution designed for coffee equipment, especially if your jug or steam wand develops off smells or sticky buildup. For electric frothers, check the heating element area for milk residue—this is a common source of burnt smells and poor frothing. Always follow the manufacturer’s instructions for chemical cleaners, and rinse thoroughly after use. For more on food safety and cleaning, check the Hong Kong Centre for Food Safety for general guidelines on milk and dairy equipment.
When to replace parts—or your whole frother
With regular cleaning, most home milk frothers last 1–3 years. Mesh plungers and whisk heads wear out first, especially if you use them daily or scrub aggressively. Look for replacement parts (like new mesh screens or whisks) before tossing the whole unit. Electric models sometimes develop electrical issues if water gets inside, so check your warranty before attempting repairs. For steam wands, worn gaskets and blocked tips are the most common failure points and can often be fixed with inexpensive parts.
Ready to upgrade or replace your frother? Compare current options for the latest manual, electric, and steam wand setups.
Frequently asked questions about cleaning milk frothers
How often should I clean my milk frother?
Clean every part that touches milk after every use. Even one missed cleaning can leave behind bacteria and cause sour smells. For deep cleaning, aim for once a week or every 10–15 uses, especially if you notice residue or odors.
Can I put my milk frother in the dishwasher?
Most manual pump jugs have dishwasher-safe jugs, but mesh and plunger parts often need hand washing. Electric frother jugs may be dishwasher-safe, but never put the base or electrical parts in water. Always check your manual for specific guidance. If you want the easiest cleanup, See today’s deals on dishwasher-compatible options.
What’s the best way to clean a steam wand?
Immediately after steaming milk, wipe the wand with a damp cloth and purge steam for a few seconds. For a deeper clean, soak the tip in a milk cleaner solution once a week. Never use pins or needles to clear clogs—most wands unscrew for safe cleaning.
Manual pump jug vs. electric jug: which is easier to clean?
Manual pump jugs are usually simpler, with fewer parts and no electrical components—just soak and scrub. Electric jugs have more nooks, nonstick coatings, and bases that must stay dry, adding to cleanup time. If easy cleaning is your priority, manual wins for most people.
How long does it take to clean a milk frother?
Handheld wands and manual pump jugs take 1–5 minutes for daily cleaning. Electric jugs and steam wands need 5–8 minutes, especially if you disassemble and wipe every part. Deep cleaning with soaking or specialty cleaners can add another 10 minutes, but isn’t needed daily.
What should I do if my frother smells bad even after cleaning?
Persistent odors usually mean milk residue has built up in hard-to-reach spots. Disassemble every part and soak in a diluted vinegar or specialty milk cleaner solution, then rinse thoroughly. If the smell returns, it may be time to replace worn mesh, whisks, or seals. To avoid this in the future, rinse immediately after every use and dry completely before reassembling.
Does cleaning affect the froth quality?
Absolutely. Milk residue can clog mesh, stick to whisk heads, and interfere with heating elements, all of which reduce foam quality. Regular cleaning ensures you get smooth, stable microfoam each time—worth the extra few minutes. If your foam is consistently poor, consider upgrading to a model with easier-to-clean parts: View what’s available.
Final thoughts—cleaning is part of great coffee
Keeping a milk frother spotless isn’t just about hygiene—it directly affects the taste and texture of every drink you make. The best routine is the one you’ll actually follow, so choose a frother and cleaning method that fits your habits. Clean promptly, avoid shortcuts that damage your gear, and you’ll get better coffee and a longer-lasting frother—no sour surprises in your next cup.

Last updated: June 2026 · Our research process