
8 min read
Disclosure: As an Amazon Associate and eBay Partner Network publisher, we earn from qualifying purchases. This doesn’t affect what we recommend or how we describe it.
Priming a coffee machine means running water through its internal system to remove air pockets and ensure smooth water flow. This simple process is essential for new machines, machines coming out of storage, or after any maintenance. Priming protects your pump, prevents sputtering, and helps every shot taste the way it should. This guide explains why priming matters, how to do it for different machine types, and the key specs that make a difference for home brewers.
Spot the difference between machine types before you prime
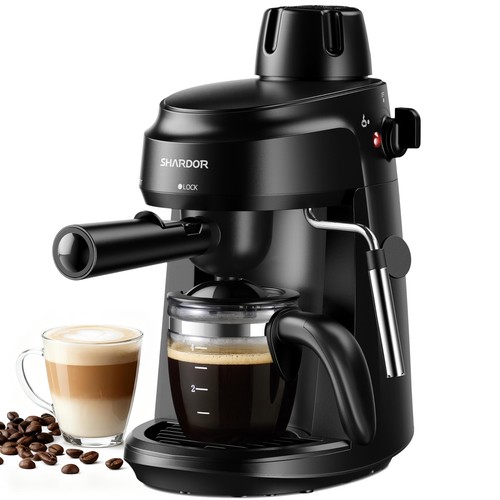
Not all coffee machines prime the same way. The process depends on whether you have a pump-driven espresso machine, a semi-automatic with a removable reservoir, a super-automatic with built-in grinders, or a simple single-serve pod machine. Each design has its own quirks and steps. Priming a pump espresso machine with a 2-liter reservoir and a 15-bar pump is different from priming a single-serve pod brewer with a 40-ounce tank and basic water lines. Here’s a table that compares the most common home coffee machine configurations for priming.
| Configuration | Typical Water Capacity | Pump Pressure (bars) | Priming Time (min) | Ease of Access | Price |
|---|---|---|---|---|---|
| Pump Espresso Machine | 1.5–2.5 liters | 9–15 | 4–7 | Removable tank, easy reach | $$$ |
| Semi-Automatic Drip Brewer | 1.0–1.8 liters | — | 2–4 | Top-fill, easy | $$ |
| Super-Automatic Espresso | 1.8–2.2 liters | 15–19 | 7–10 | Enclosed tank, some disassembly | $$$ |
| Single-Serve Pod Machine | 32–48 ounces | — | 1–2 | Removable tank, very easy | $ |
How to prime a coffee machine: step-by-step instructions
Most home coffee machines follow a similar priming logic: fill the reservoir, run water through the system, and check for steady flow. Here’s a general step-by-step guide that works for the vast majority of pump espresso machines and drip brewers. Always check your manual for model-specific quirks, but these steps cover the basics for home use.
- Fill the water reservoir to maximum
- Turn the machine on and let it heat up
- Run water through the brew head (and steam wand, if present)
- Repeat if needed until flow is steady
- Check for leaks and listen for normal pump sounds
Use fresh, cold water and make sure the reservoir is seated correctly. This helps the pump draw water in without sucking air.
Wait for any “ready” light or heating indicator to signal the machine is at temperature. This prevents accidental damage to heating elements.
Without coffee or a pod in place, start a brew cycle or open the steam valve. Let water flow out until it runs smoothly, with no sputtering or gurgling.
If water spits, stops, or flows unevenly, stop and start the process again. Air pockets sometimes need two or three cycles to clear.
Inspect connection points and listen for a constant humming from the pump. Any screeching or persistent “dry” sounds mean more priming may be needed.
Choose the right priming method for your setup
Priming isn’t one-size-fits-all. The best approach depends on your machine’s internals and how often you use it. Here’s how priming looks for the most common home coffee setups:
- Pump-driven espresso machines: These require running water through the brew head and, if present, the steam wand. Machines with three-way solenoid valves sometimes need extra cycles to clear air from the lines.
- Semi-automatic drip brewers: Just run a brew cycle with water only. Some have a “clean” or “flush” mode that helps with priming.
- Super-automatic espresso machines: These often have a dedicated “prime” or “rinse” button. Follow on-screen prompts, and be prepared for a longer process (up to 10 minutes) if the machine hasn’t been used in weeks.
- Single-serve pod machines: Fill the tank, run a cycle without a pod, and repeat until water flow is strong and steady. These are the quickest to prime, often less than two minutes.
For machines with built-in grinders and milk systems, always prime both the brew and steam circuits. Neglecting one can cause sputtering or even pump failure.
Related Guides
- How to Prime a Coffee Machine: Step-by-Step Guide for Beginners
- How to Remove Coffee Stains From Your Machine: A Simple Guide
- Best Automatic Drip Coffee Makers for Effortless Brewing
- Coffee Carafes Worth Buying: Our Practical Guide
- Coffee Knock Boxes That Are Actually Worth Buying
- Our guide to Coffee Scales With Timers: Which Ones Are Actually Worth Buying?
Specifications that actually matter
Pump Pressure (bars)
Pump espresso machines should deliver at least 9 bars of pressure for proper extraction. Machines rated at 15 bars or more often “overstate” the actual brewing pressure, but higher specs can help clear air during priming. Look for a pressure gauge or digital readout for best results.
Reservoir Capacity (liters/ounces)
Larger reservoirs (1.5 liters or 48 ounces and up) mean less frequent refilling and a smoother priming process. Tiny tanks are prone to sucking air, especially if you forget to top up. Check that the reservoir is easy to remove and reseat—leaks at this connection are a common source of priming problems.
Access to Water Pathways
Priming is easiest when you can reach both the brew head and steam wand. Machines with removable drip trays and visible tubing make it simple to spot air bubbles or leaks. Enclosed “bean-to-cup” machines often require more time and patience to fully prime.
Priming Cycle Time
Some machines advertise “quick start” or “auto-prime” features, but actual cycle times vary from 1 to 10 minutes. Shorter cycles are more convenient, but longer cycles may be needed if your machine has sat unused for weeks or after deep cleaning.
Compare current options for machines with fast, reliable priming cycles.Why priming matters for every home coffee setup
Priming isn’t just about getting water to flow—it directly affects taste and machine longevity. Without priming, air pockets can cause your pump to run dry, which risks expensive damage. Unprimed lines also lead to uneven water distribution over your coffee grounds, which means sour, under-extracted shots or weak drip brews. Proper priming is especially crucial after descaling, storage, or shipping, when air is most likely to get trapped.
Regular priming also keeps your machine free of lingering cleaning agents or mineral buildup. For more on how water quality impacts home coffee gear, check out resources from CoffeeGeek, a respected source for home coffee enthusiasts.
How do you know if you’ve primed successfully?
Look for a steady, uninterrupted stream of water from the brew head or steam wand. The pump should sound smooth and consistent—not strained or screechy. If your machine has a pressure gauge, it should reach the normal brewing range (usually 9 bars for espresso). Any sputtering, gurgling, or pulsing means there’s still air in the system. Repeat the priming process until these symptoms disappear.
View what’s available for home brewers who want low-maintenance, easy-priming machines.FAQs about priming a coffee machine
How often should I prime my coffee machine?
Prime your coffee machine every time it’s been unused for more than a week, after descaling or cleaning, or whenever you notice sputtering or weak water flow. Daily users typically only need to prime after a deep clean or if the tank runs dry.
What’s the difference between priming and descaling?
Priming clears air from the water lines and pump, while descaling removes mineral buildup inside the boiler or heating element. Descaling is a chemical process, usually done every 2–3 months, whereas priming is a mechanical process you do as needed.
Is it safe to use hot tap water for priming?
Always use cold or room-temperature water to fill your reservoir. Hot tap water can contain more minerals and may damage internal components. If you want to reduce scale, use filtered or softened water, but avoid distilled, which can confuse sensors.
How long does priming usually take?
For most home machines, priming takes between 2 and 7 minutes. Single-serve pod machines can be primed in as little as 1–2 minutes, while super-automatic espresso systems might require up to 10 minutes on first use or after storage.
Pump espresso vs. single-serve: which is easier to prime?
Single-serve pod machines are much easier and faster to prime—just fill the tank and run a cycle or two. Pump espresso machines require more steps, especially if you have a steam wand or a three-way valve, but offer better control for enthusiasts.
What if my machine won’t prime at all?
If water won’t flow after several attempts, check for a clogged intake, kinked tubing, or an improperly seated reservoir. Persistent problems may signal a worn-out pump or solenoid valve—both are common failure points. Most home machines have a 1- or 2-year warranty, but check your manufacturer’s policy before attempting repairs.
Can I prime my coffee machine without the manual?
Most machines can be primed by following the steps in this guide, but if you’re unsure about a specific valve, button, or part, look for diagrams or videos from reputable coffee forums like Home-Barista. The coffee enthusiast community is a great resource when manuals are missing.
Priming your coffee machine is one of the simplest ways to get better-tasting coffee and a longer-lasting machine. It’s a quick ritual that pays off every time you brew. Whether you’re a beginner or a seasoned home barista, knowing how to prime ensures your gear works the way it should—and your morning cup is as good as it can be.


Last updated: June 2026 · Our research process