7 min read
How do you steam milk so it’s creamy and silky, not foamy like a latte cloud? You’re not alone. Many home baristas struggle to get that smooth, “wet paint” texture for flat whites or classic cappuccinos, especially when using consumer espresso machines or manual steamers. The secret to less foam isn’t just in the milk—it’s in your technique, timing, and the gear you use. Let’s break down exactly how you can steam milk with less foam at home, no matter your setup or skill level.
Choose the right milk for minimal foam
Milk choice makes a real difference. Whole milk (around 3.5% fat) gives a creamier texture and makes it easier to avoid excess foam. Lower-fat milks and plant-based options like almond or oat tend to froth up more and can be harder to keep under control. For the smoothest microfoam, stick to fresh whole milk, ideally with a protein content over 3.2%—check the label if you want to get nerdy. Milk that’s too old or has been previously heated won’t texture as well. Freshness and fat matter.
Spot the difference between foamy and silky milk
It’s easy to mistake a mountain of foam for “good” steamed milk, but true café-style milk is glossy and pourable, not bubbly or stiff. Here’s how you can tell:
- Too much foam: Large bubbles, dry texture, sits on top of espresso like meringue.
- Silky milk: No visible bubbles, looks like wet paint, blends seamlessly with espresso.
If your milk sits in the pitcher like shaving cream, you’ve either over-aerated or steamed too hot. Aim for a final temperature between 140°F and 150°F (60°C–65°C) for the best texture and sweetness.
Comparison table: steaming setups and their foam control
| Setup Type | Steam Pressure | Pitcher Size Supported | Temp Control Accuracy | Foam Control Difficulty |
|---|---|---|---|---|
| Entry-Level Single Boiler | 2–3 bars | Up to 12 oz (350 ml) | ±8°F (±4°C) | Hard |
| Manual Steam Wand (Stovetop) | 1–1.5 bars | Up to 8 oz (240 ml) | — | Very Hard |
| Mid-Range Heat Exchange Machine | 8–10 bars | Up to 20 oz (600 ml) | ±4°F (±2°C) | Medium |
| Premium Dual Boiler Espresso | 10–12 bars | Up to 32 oz (950 ml) | ±2°F (±1°C) | Easy |
Related Guides
- Best Milk Frothers for Lattes: A Practical Buyer’s Guide
- Automatic Milk Frothers That Can Actually Make Latte Art
- How Is Crema Formed in Espresso? The Science Behind the Signature Foam
- How Manual Milk Frothers Work: A Simple Guide for Home Brewers
- Our guide to How to Clean a Milk Frother: A Step-by-Step Guide
- Our guide to How to Froth Milk Without a Steamer: Easy Methods for Home Brewers
- Browse all Espresso & Milk →
Quick decision tree
- If you only have a stovetop or basic steamer: Use whole milk, keep the tip deeper in the milk, and stop introducing air after 2–3 seconds.
- If you want the easiest route: Premium dual boiler machines give the best control—consider an upgrade if you steam daily.
- If you’re on a budget: Entry-level single boilers can work, but focus on technique over hardware. See today’s deals
- If you’re making large drinks for a crowd: Heat exchange or dual boiler machines handle bigger pitchers without losing steam pressure.
- If temperature precision matters most: Look for setups with PID controllers for ±2°F accuracy.
Master the “how to” steps for less foam
- Start with cold, fresh whole milk.
Pour the amount you need into a clean stainless steel pitcher—fill to just below the spout for best control. - Submerge the steam wand tip just below the surface.
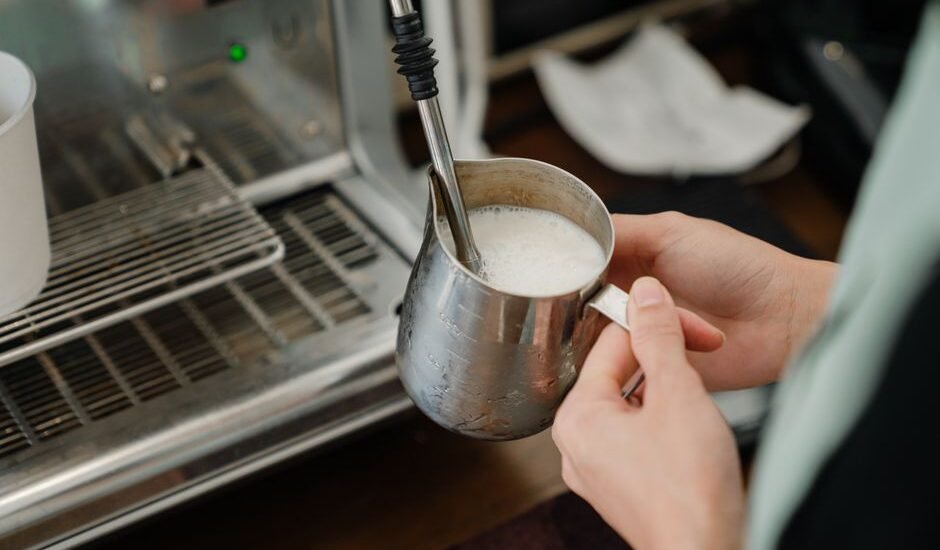
Position the tip about 0.5 cm under the milk, near the pitcher’s side, and open the steam valve fully. - Introduce air for only 2–3 seconds.
You’ll hear a gentle “chirp” or “tss tss”—that’s air being incorporated. After 2–3 seconds, lower the wand tip deeper (about 1–1.5 cm) to stop adding more air. - Angle the pitcher to create a whirlpool.
Tilt the pitcher so the milk spins in a vortex. This helps break up any large bubbles and creates silky microfoam. - Heat to the right temperature.
Stop steaming when the pitcher bottom is just too hot to hold (140–150°F / 60–65°C). The milk should look glossy, not bubbly or dry. - Tap and swirl.
Gently tap the pitcher on the counter and give it a swirl to pop any remaining bubbles and fully blend the texture. - Pour immediately.
Don’t wait—milk separates fast. Pour into your espresso shot for the best blend and appearance.
Why does steam pressure matter so much?
Steam pressure directly affects how easily you can texture milk with less foam. Low-pressure systems (under 3 bars) struggle to create a fine vortex, making it harder to avoid big bubbles. Machines with 8–12 bars of steam pressure let you inject less air and get a better whirlpool, which is key for silky milk. If your machine feels weak or takes over 30 seconds to heat 6 oz (180 ml) of milk, consider if an equipment upgrade is in order. View what’s available
Upgrade your pitcher for better control
Not all pitchers are created equal. A classic stainless steel pitcher with a narrow spout (12–20 oz / 350–600 ml) gives you more control over both steaming and pouring. Avoid plastic or glass—metal conducts heat better, letting you feel the temperature with your hand. Look for a pitcher with a marked fill line and a spout shaped for latte art, even if you’re not pouring hearts yet. See today’s deals
Get results with manual steamers and frothers
If you’re using a manual steamer (like a stovetop or handheld pump), you’ll need extra care. These setups rarely hit more than 1–1.5 bars of pressure, so you can’t rely on a strong vortex. To avoid too much foam:
- Keep the wand tip deeper in the milk from the start.
- Skip the “stretching” phase—focus only on heating and gentle swirling.
- Accept that you may get a slightly denser texture, but you can still get close with practice.
Manual frothers (the plunger type) are almost impossible to use for less foam—they’re designed for froth, not microfoam. If silky milk is your goal, a steam wand is the way to go.
FAQs about steaming milk with less foam
How long should I steam milk to avoid too much foam?
For less foam, introduce air for only 2–3 seconds at the start, then keep the wand tip submerged and steam until the milk reaches 140–150°F (60–65°C). For a 6–8 oz (180–240 ml) pitcher, this usually takes 30–45 seconds. Over-steaming adds unwanted bubbles and can scorch the milk.
Can I get less foam using non-dairy milk?
Yes, but it’s trickier. Many plant-based milks (like almond or soy) froth up quickly and can separate if overheated. Oat milk with higher protein content steams most like dairy, but always stop aerating early and avoid overheating. Some barista-style non-dairy milks are formulated to help you get silkier results.
Manual steam wand vs. electric steam wand — which is better for less foam?
Electric steam wands on mid- and high-end machines produce higher, more consistent pressure (8–12 bars), making it easier to control foam and create a vortex. Manual wands, especially on stovetops, usually offer less pressure and less control, so they’re more prone to making foamy milk. For the smoothest results, an electric steam wand is the clear winner.
How do I know if my pitcher is the right size?
Choose a pitcher that matches the amount of milk you’re steaming—ideally, fill it to just below the spout. For a single drink, a 12 oz (350 ml) pitcher works best. Too much empty space makes it harder to create a vortex and control foam, while overfilling risks spills and uneven heating.
What if I don’t have a thermometer?
You can still get good results by feel. When the bottom of the pitcher is just too hot to touch for more than a second, you’re likely in the 140–150°F (60–65°C) range. Practice helps—if you scorch the milk (smells burnt or tastes flat), stop sooner next time.
Are there any common machine issues that make it hard to steam milk with less foam?
Yes—low steam pressure, a clogged steam wand tip, or inconsistent temperature control can all make it tough to avoid foam. Entry-level machines often struggle with sustained steam, and if the wand holes are blocked (even partially), you’ll get uneven bubbles. Regular cleaning and descaling help keep performance strong. Always check your machine’s warranty and support policies for repairs or part replacements.
Fine-tune your technique for consistently silky milk
Don’t be discouraged if you don’t nail it on your first few tries. Even with a modest single boiler or a manual steamer, you can improve with repetition. Focus on introducing less air, keeping the milk spinning, and stopping at the right temperature. Every machine and pitcher has its quirks. Take notes after each session, tweak your timing, and you’ll dial in your milk texture in no time.
For deeper background on the science of milk frothing and steaming, see the Specialty Coffee Association, which sets standards for café milk texture and technique. Their guides are a solid reference if you want to get more technical.
Last updated: June 2026 · How we cover this topic